General
In addition to the option to open and view files directly in your browser, the PIRS File Viewer available since PIRS release 3.0, offers to also annotated all types of office documents (word, excel, powerpoint, PDF,…).
Instead of opening a document in a new tab in your browser, the PIRS File Viewer opens documents directly within your PIRS project. Furthermore, it offers several annotation and flag functions which will be introduced in detail below.
Open Documents in PIRS File Viewer
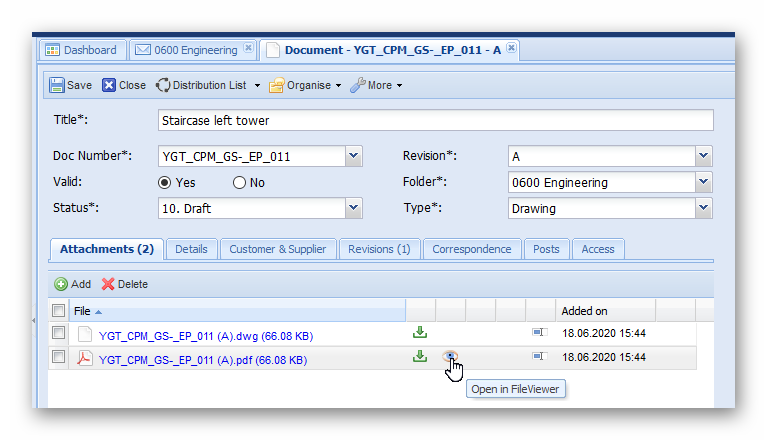
In order to open a document in the PIRS File Viewer, you need to click the  - symbol presented to you on the right hand side of an office file stored in PIRS.
The File Viewer supports about 100 different file formats, most commonly used are PDF or picture formats such as PNG or GIF.
- symbol presented to you on the right hand side of an office file stored in PIRS.
The File Viewer supports about 100 different file formats, most commonly used are PDF or picture formats such as PNG or GIF.
If the File Viewer is activated, the selected file will be opened within your PIRS project. Otherwise a new browsers tab will be used to display the file.
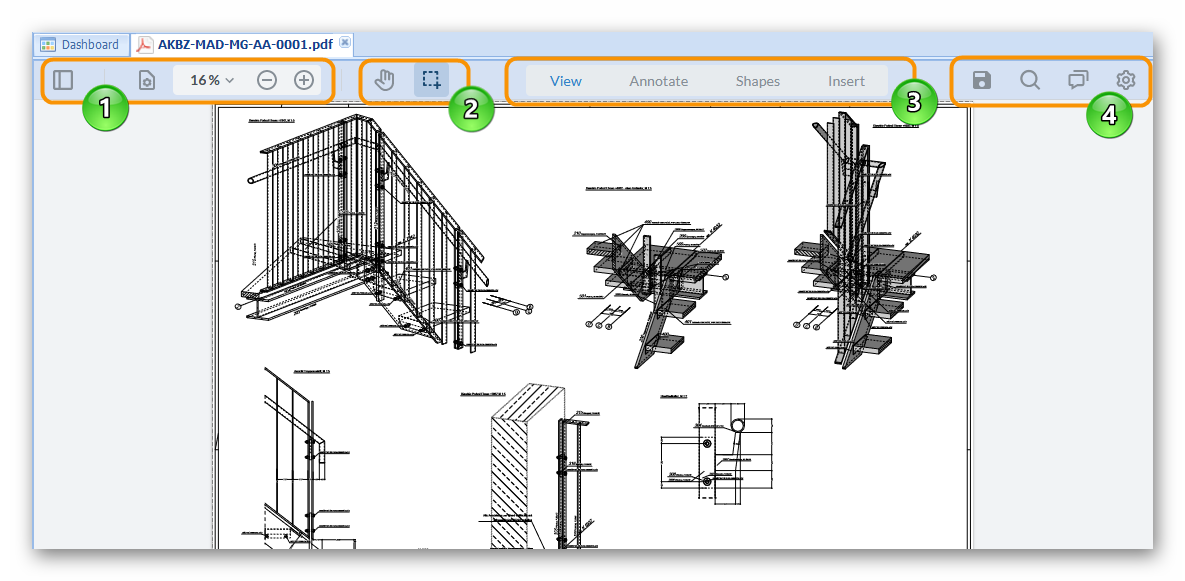
There are four different sections within the file viewer.
-
The first allows you to
-
open the panel (
 ) where you can review a thumbnail image of your document or access the outline
 -
zoom in or out or generally resize the display (
 )
) -
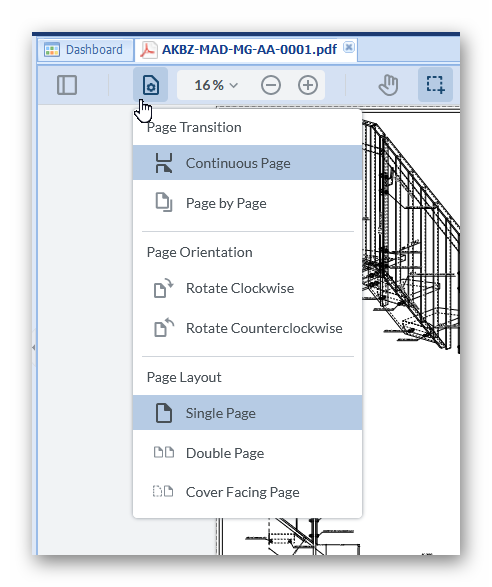
or adjust the display of your document (regard screenshot to the right). Here you can choose for example to rotate the picture or in case the document has several pages display them side by side, continuously or separately.
-
-
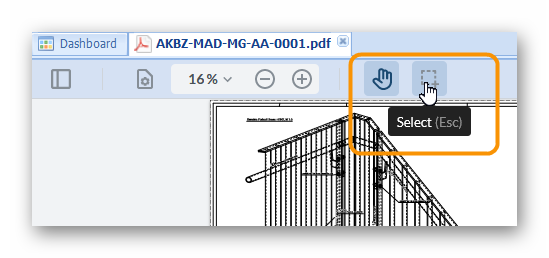
The second area within the tool bar enables you to switch from selection tool to the hand tool which allows you to manually move the image around
-
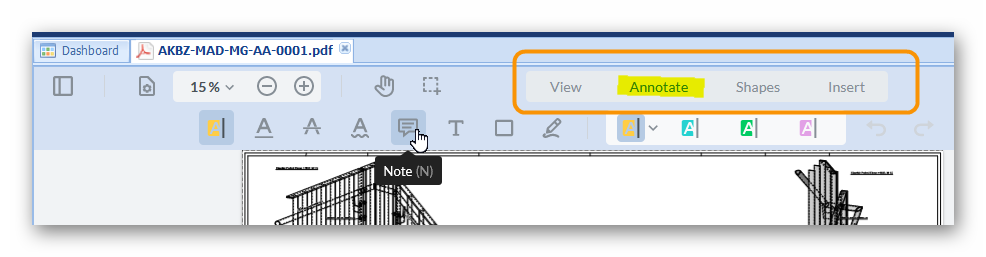
The third area offers the option to open the view display and choose between different annotation tools which will be explained in detail in the following table.
-
The forth area includes
-
a button for saving your annotations (
 )
) -
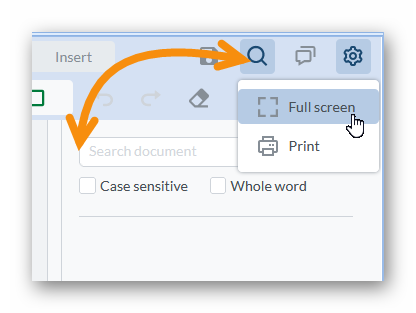
the option to switch to a full screen display or directly print the document (
 )
) -
a search which allows you to enter a search term. Results will be displayed as soon as you start typing and can be adjusted by using several offered search criteria (
 ).
). -
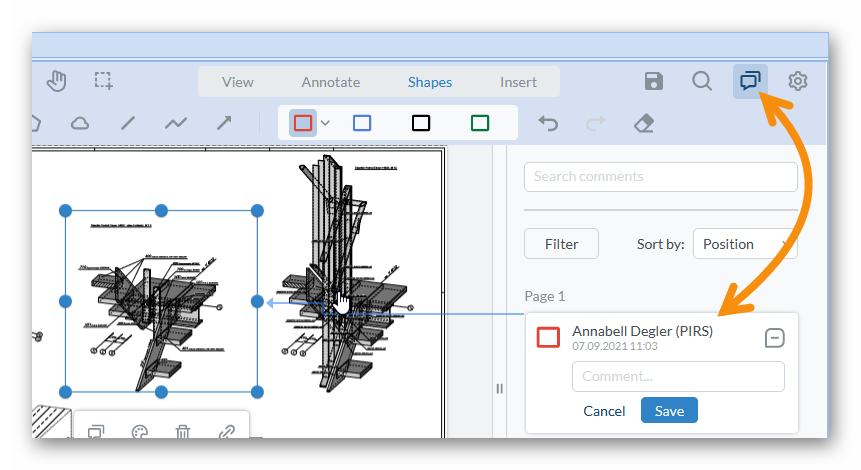
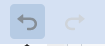
the option to leave comments and communicate with your colleagues directly within the file viewer (
 ).
).
-
the option to hide all comments (
 ).
By clicking this action, you all made annotations are removed and you will see the original document without the redlining.
Clicking the action again will again display the redlining layers on top of the document.
).
By clicking this action, you all made annotations are removed and you will see the original document without the redlining.
Clicking the action again will again display the redlining layers on top of the document.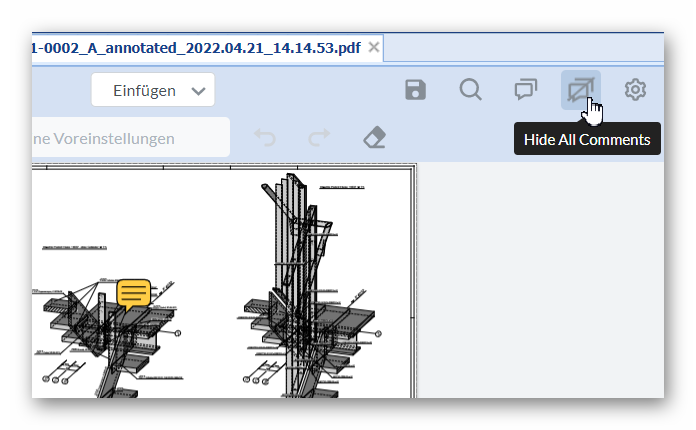
-
Annotations, Comments and Flags
Following table lists all offered functions to include your comments and annotations within a file in PIRS.
Made changes will be saved only after you have clicked save (  ).
Each annotation will display the name of the person that made the changes as well as the time it was made.
).
Each annotation will display the name of the person that made the changes as well as the time it was made.
There are four different sections to choose from within the annotation area:
-
Annotate - Offers different note, remark and highlight options
-
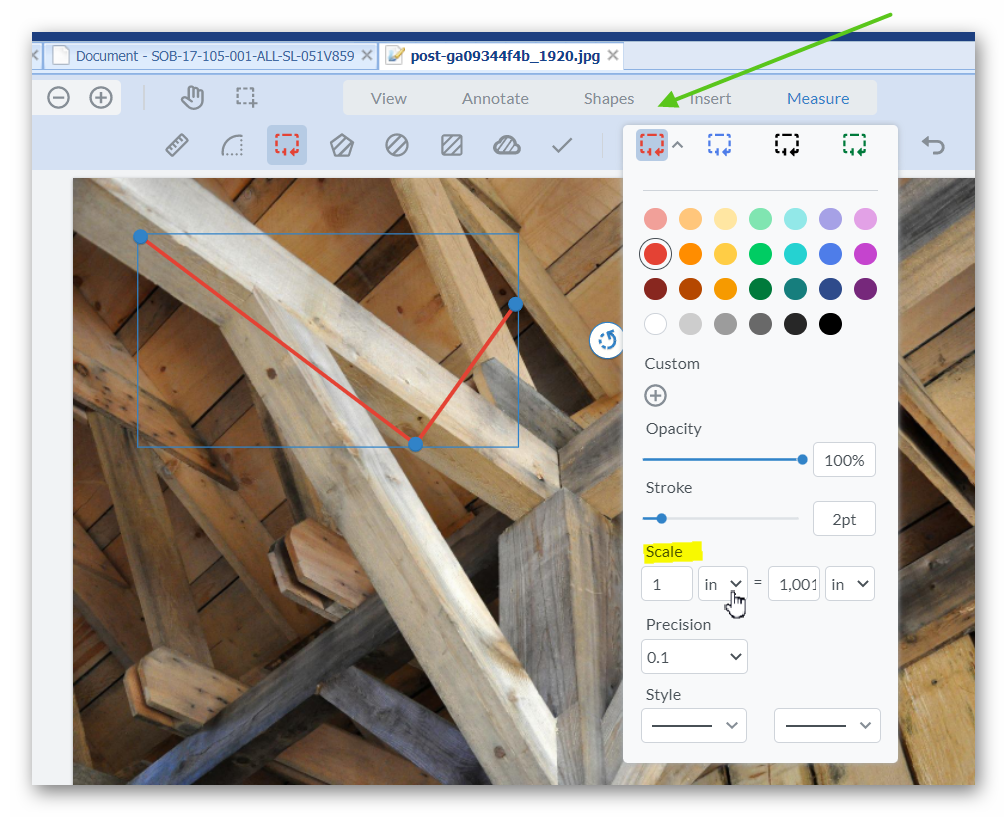
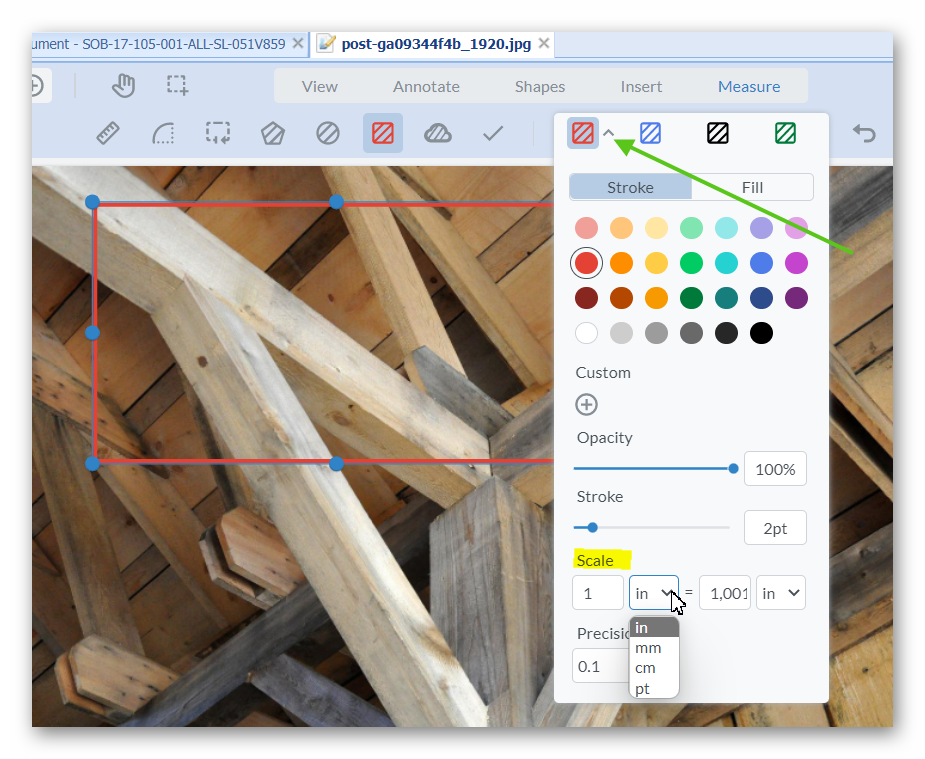
Shapes - Offers various shapes to mark an area
-
Insert - Offers options to set stamps and signatures
-
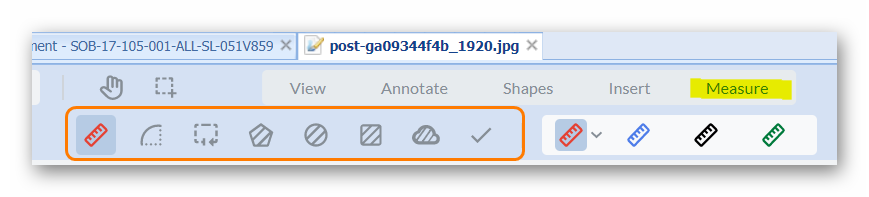
Measure - Offers different options to assign measures to sections, areas, etc.
| Section | Symbol | Short Description | Long Description |
|---|---|---|---|
Annotate |
|
||
|
Text tools:
|
|
|
|
Note |
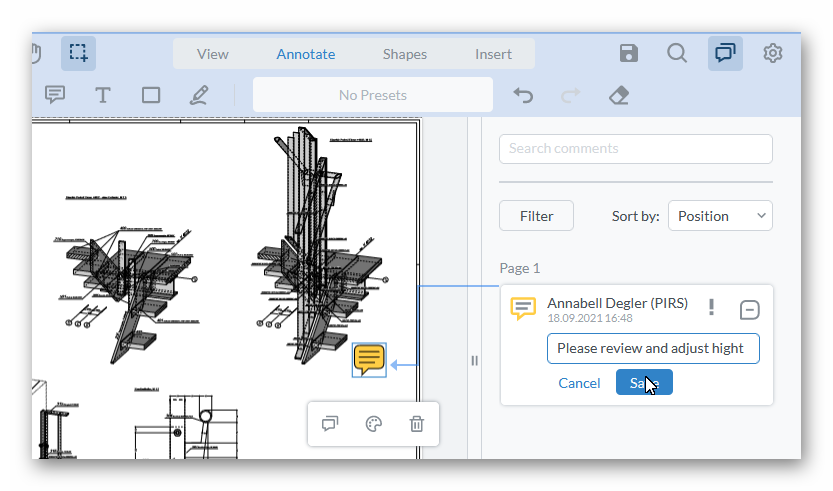
Select the comment symbol, then click on the area in the opened file you like to comment on. A note symbol will appear and the comment box will open in your panel. Here you can add your notes. Then click save. Should you wish to reply to a comment regardless who left it, you can use the reply feature within the panel.
|
|
|
Free Text |
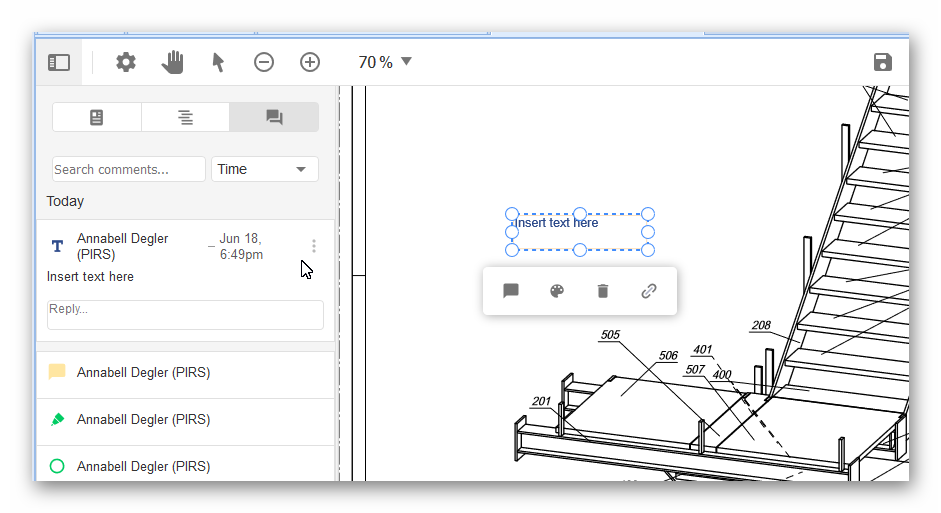
In order to enter text anywhere on your document select this symbol. Then left click the area within which you like to insert your text. Enter your text within the box that appears. Color, thickness, text size as well as the box border and fill can be adjusted prior to selecting the area or afterwards by selecting the item within your panel.
|
|
Annotate & Shapes |
|
Free hand tool |
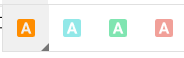
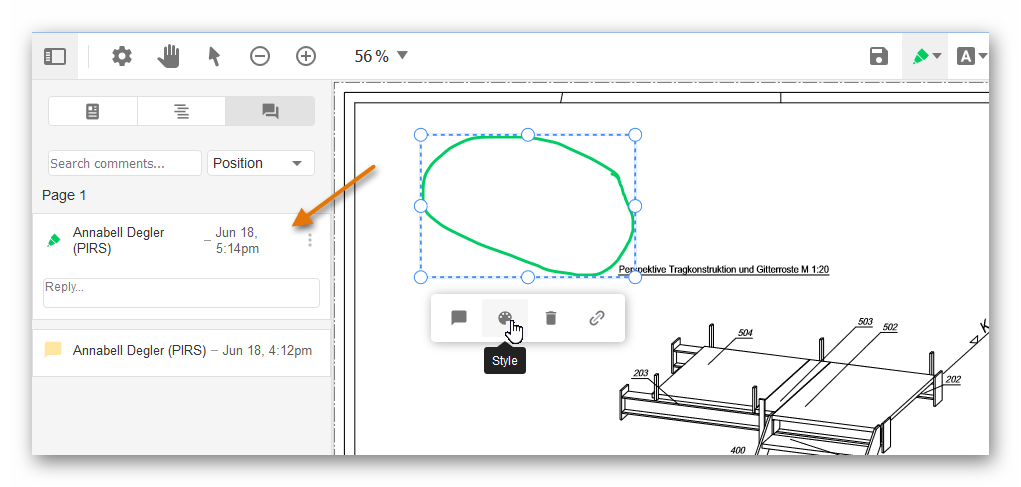
Prior to making free hand annotations or highlight an area free hand, you can pick the color. As soon as you finished the annotation, the item will appear within the panel.
If you select the item in the panel and then right click on the marked annotation you are able to
|
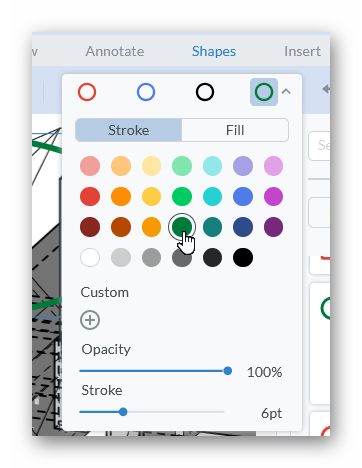
Shapes |
|
||
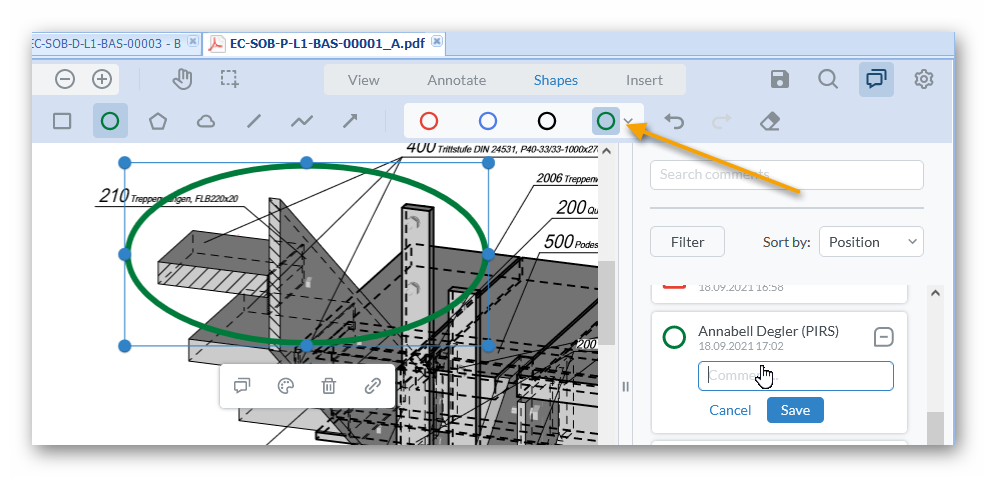
Within the shape tools you are able to pick between
For each shape you can select the color of its border and, if it offers it, its fill. In addition you can also select its opacity as well as the thickness. As with all annotations, these style settings can be adjusted and supplemented afterwards by selecting the item within the panel.
|
|||
Insert |
|
||
|
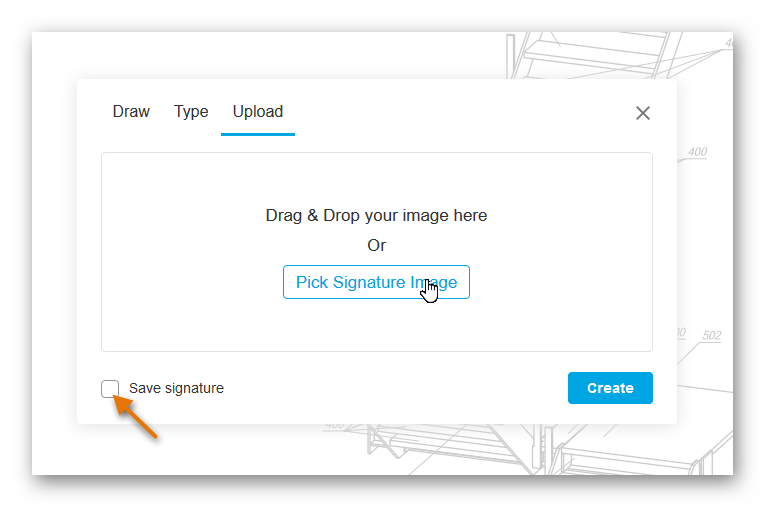
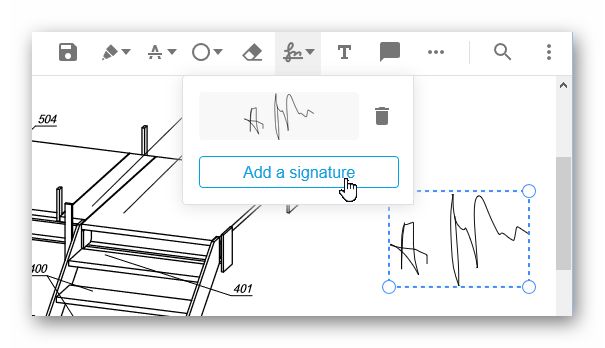
Signature |
The signature tool allows you to either draw your signature or initials by hand. Type it with our keyboard or upload a digital image of it. By selecting the option "Save signature" you can save the image for later annotations. The image you upload will be save with your profile, therefore only be available for your own use, not other PIRS users. You can always delete, replace or add additional signatures to your profile.
You can save up to 4 personal signatures within your account. |
|
|
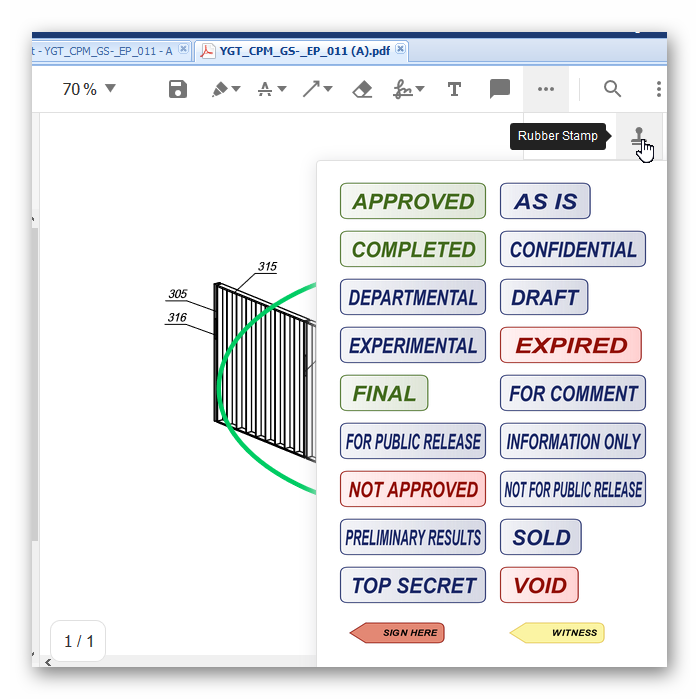
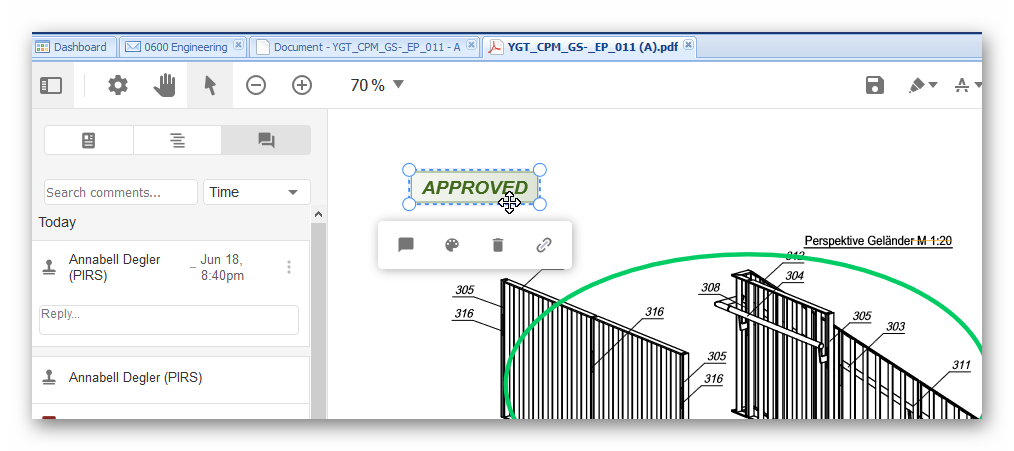
Rubber Stamp |
This tool offers a set of preset stamps for you to choose from. Once you select a stamp you can still move and resize the image right away.
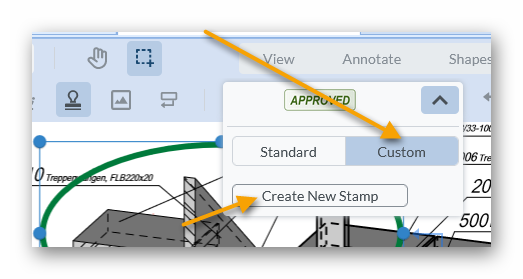
In addition, you can of course also select the item within the panel and further edit the stamp. There is also the option to custom create a stamp.
First select the "Custom" section of the rubber stamp, next click "Create New Stamp". A pop up window opens, allowing you to enter your personal text, choose a color and decide which additional information, such as user name or time stamp, you would like to include.
Once you click "Create", your custom stamp can be placed. Please also note that it is possible to include your company’s custom stamp design. To learn more about this feature, please get in touch with the SOBIS Service Desk. |
|
|
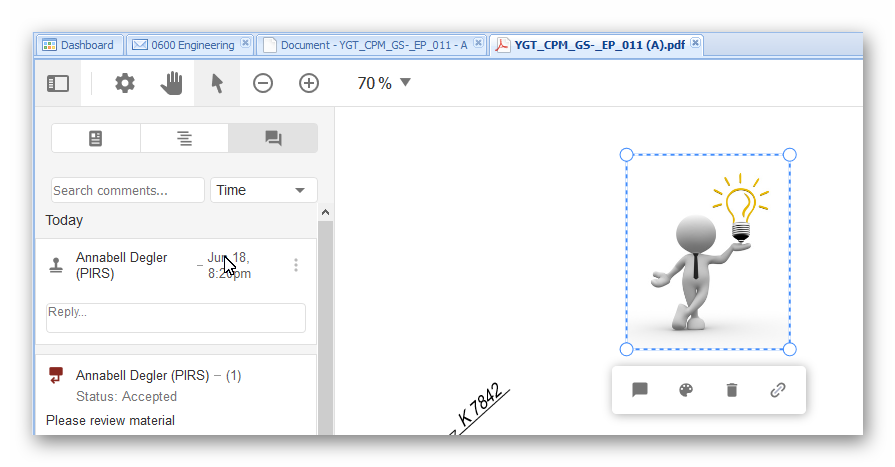
Stamp |
By clicking this symbol, you can temporarily upload an image to be included as stamp within your document. First click the symbol, next click on the spot you would like to insert the image. Your explorer will be opened automatically, allowing you to select the file.
The image will be included on your document and listed as annotation item in your panel. You can still move, edit and resize your stamp.
Please be aware that a stamp is only uploaded temporarily and will not be stored for the next use. |
|
|
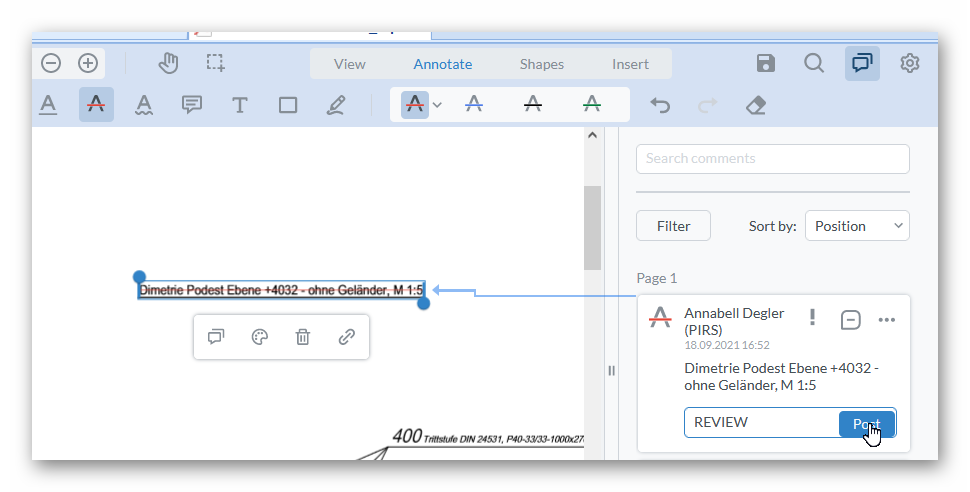
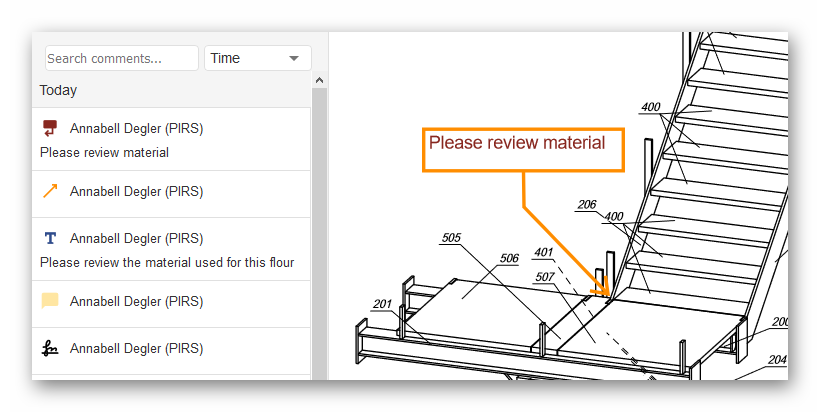
Call-out |
A call-out is a special type of comment that allows you to point out a specific space or area on your document.
Click on the spot you like to draw attention to. Then use the left click again in order to insert your comment. The selected spot and your comment box will be connected with an arrow. |
|
Measure |
|
||
|
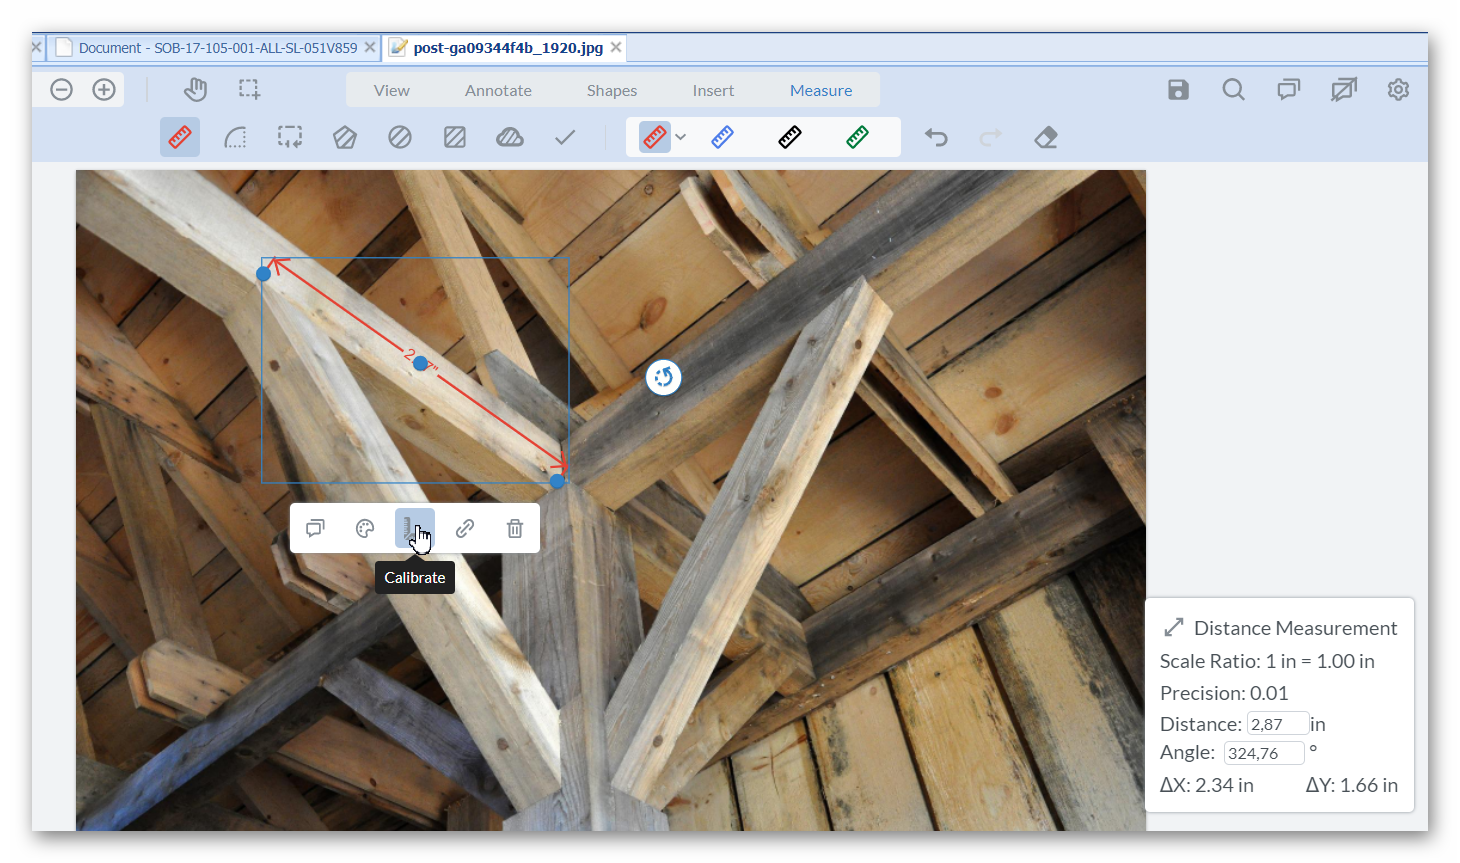
Distance |
The distance option allows you to measure distances, trace and assign perimeter in drawings. You can leave comment concerning the measurements and change the scale of measurement (calibrate) to match the specifications. |
|
|
Arc Measurement |
This feature allows you to mark and measure the details of an arc, you are also able to assign new ratios and scale the arc. |
|
|
Perimeter |
The perimeter option allows you for example to calculate the circumference of an area of section. Simple mark the section or area. Click once to mark a turning point and twice when you are finished marking. Select the setting adjustments to change colors, opacity, stroke thickness or modify scaling and precision.
|
|
|
Area |
The Area options offer you the option to define a specific area within your document, assign ratios and measures and leave comments. |
|
All Sections |
|
Eraser |
The Eraser can be used to delete made notations. Keep in mind that this eraser is not going to erase elements within the document, but only made annotations. |
|
Undo & Redo |
These buttons allow you to undo or redo steps. To undo a notations You can of course also use the keyboard combination (CTRL + Z or for German boards STRG + Z). |
|


Comments/Panel
As mentioned above you are always able to select an annotation to change its style, add a comment, delete it or add a link to it. Simply select the item, the viewer will automatically jump to the annotation and mark it. Then right click the annotation to open the options underneath.
In case the panel area/comments section is not displayed to the right already, you can open it by clicking the "Comments" symbol within the right hand corner of your tool bar.
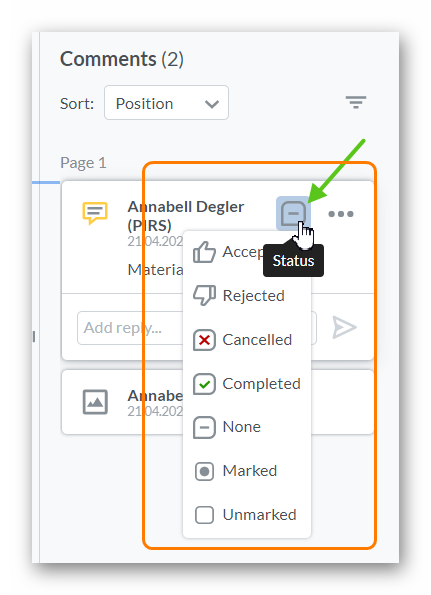
In order to remove an annotations, regardless whether your have already saved it or not, select the annotation item, then either click the delete key on your keyboard or open the options listed in the right corner of the item and select "Delete".
Besides the option to delete an annotation, you are also able to edit it.
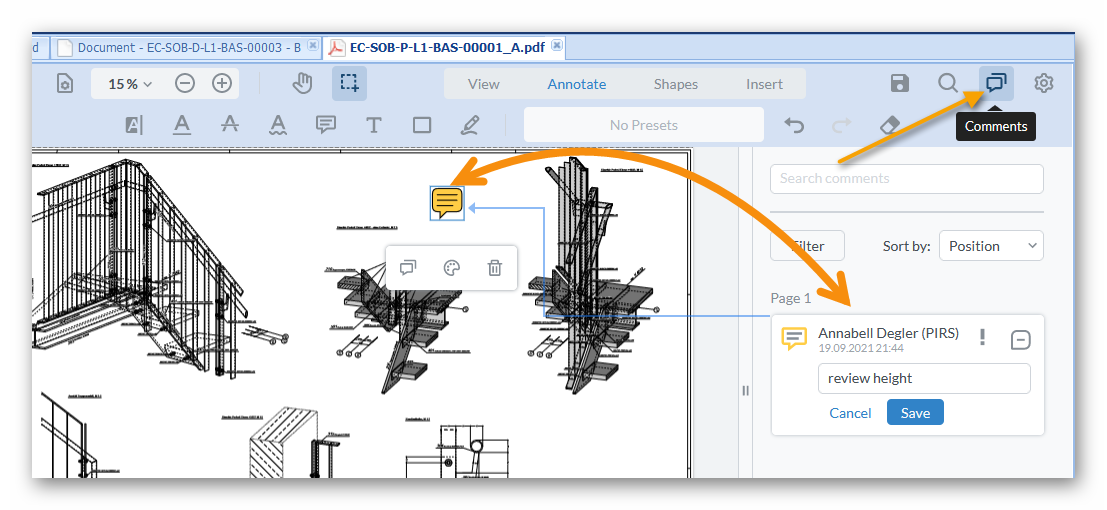
Furthermore, you can set a status for the item that for example reflects your review result. Here you can e.g. choose between accepted, rejected, cancelled or completed.
Once you selected the status, it will be listed directly underneath the annotation within the panel. You can always edit the status.
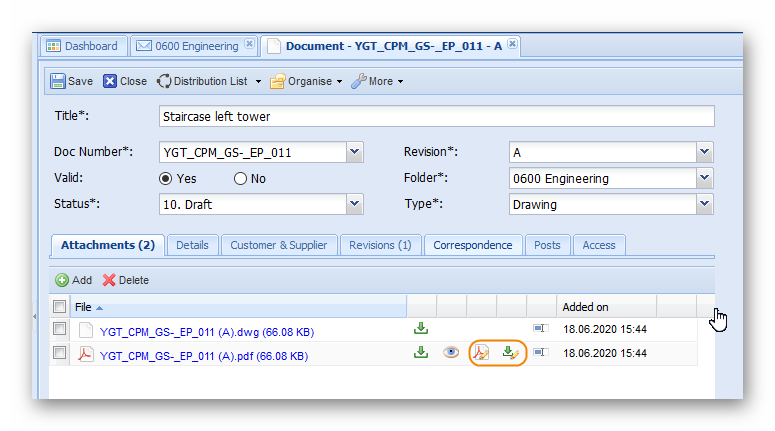
Save and download annotated files
Once you have saved annotations for a file, two more symbols will appear within your document that are visible in edit as well as read mode (compare with screenshot).
-
Click the first new symbol (
 ) in order to save the file together with all thus far made annotations a new PDF file.
A small box will allow you to edit the file name.
By default the original file name will be supplemented with "annotated" and the current date.
) in order to save the file together with all thus far made annotations a new PDF file.
A small box will allow you to edit the file name.
By default the original file name will be supplemented with "annotated" and the current date.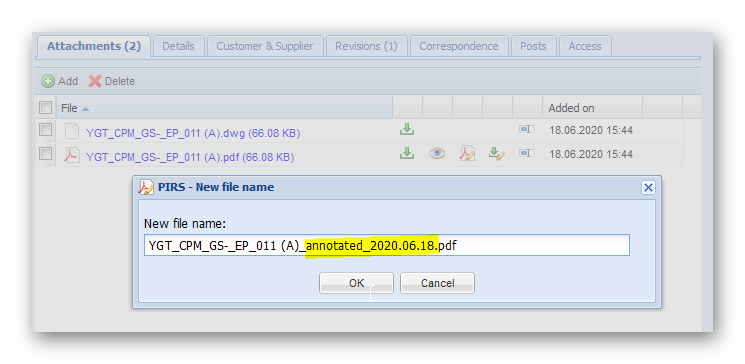
-
The new PDF file will be added to the list of files within the document and can again be open and annotated in your file viewer if required.
-
The second symbol (
 ) enables you to download the original file including all made annotations.
The file will be converted into PDF.
All annotations of the downloaded PDF can still be edited using any common PDF editor.
) enables you to download the original file including all made annotations.
The file will be converted into PDF.
All annotations of the downloaded PDF can still be edited using any common PDF editor.
| In case someone else is currently reviewing the document and has checked it out within PIRS, you will NOT be able to add any notes or annotations. In this case the file viewer will still open the file in read mode, you will however not be able to use any of the annotation features. |