Login
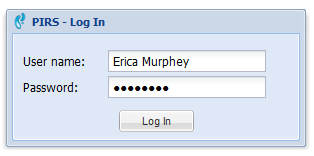 After opening the company specific PIRS application link in your browser, a white screen with a log-in window will appear.
As indicated by the image you will now be required to enter your user name / ID as well as your personal password.
After opening the company specific PIRS application link in your browser, a white screen with a log-in window will appear.
As indicated by the image you will now be required to enter your user name / ID as well as your personal password.
As soon as you have entered your personal data correctly and either clicked the "Log in" button or simply hit the enter key on your keyboard, the PIRS global page will open in your browser window. As shown in the following screenshot the global page is divided into two sections. On the left hand side all company projects are listed while on the right hand side a number of widgets are offered in a dashboard. The number and type of widgets can be altered to fit your needs (for further information on this subject refer to chapter Customize your global dashboard). Standardized the widget which allows you to view and change your settings (mail file, language, date format, etc.) is included.
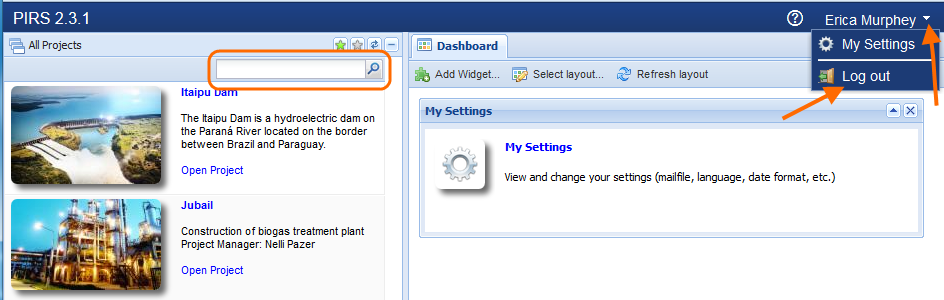
Projects, for which you were given the necessary access rights, are displayed in blue and will indicate existing links when you hover the cursor over them. You will be able to open those projects by simply clicking the respective stroke "Open Project" or the project tile. Since each selected project will automatically be opened in a new tab you can choose to open and work on as many projects as you need simultaneously.
If you have difficulties finding a specific project you can use the search box (indicated in the screenshot by the outline) that enables you to quickly locate and access the project of your choice. The "Log out" action pointed put in the screenshot by the arrows enables you to quickly leave the application. If you simply close the global window while you are working on projects in another window or tab without having log-out first, you will not be logged out of those projects and they will not close automatically. To insure that no one else can work with your account against your will, please always log out of PIRS before closing the respective windows.
Map your own contact
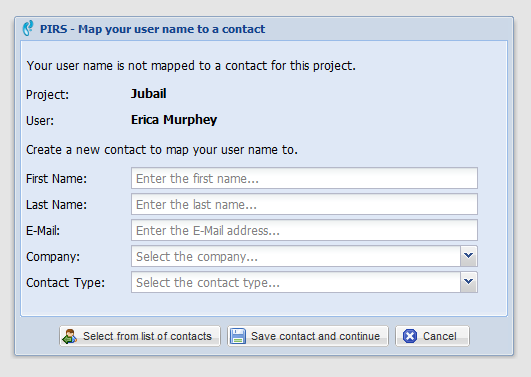
There are two things a user needs in order to access a project, the access rights and the user must be mapped to the project. The basic condition without which the user won’t be able to enter a project at all is obviously that he or she holds the required access rights to the respective project. But even though you have the access rights to a project, there is a possibility that the project won’t be displayed right away, because your user profile is not mapped to a contact in the project address book. If this is the case you will be faced with a message box asking to map your contact.
The thought process behind this is quite simple. For each project there is a specific project address book, which will be used by the application to gather and extract data each time a user sends or receives any kind of correspondence (email, letters, transmittal slips, distributions lists etc.). Therefore PIRS uses the mapping process in other to allocate a contact in the respective PIRS address book to your user name. When a new PIRS project is implemented for your company your user names will all be mapped by your PIRS support team, but in case your user name is added at a later point, your contact data were not included in the address book or your user name was not mapped to the project yet, PIRS will ask you to correct this as soon as you log into the PIRS project.
The process hereby is rather simple.
After opening a project, a message box will open that offers you two different options. You can either select an already existing contact form the address book (preferably your own) or, in case your contact is not included in the project address book, PIRS provides you with the possibility of creating your contact consisting of the basic information (compare the two following images).

In order to add further information to your contact document such as your telephone number or your personal signature, please reopen the respective document within the PIRS address book and adjust / modify the document after the mapping process is complete.